In this Post
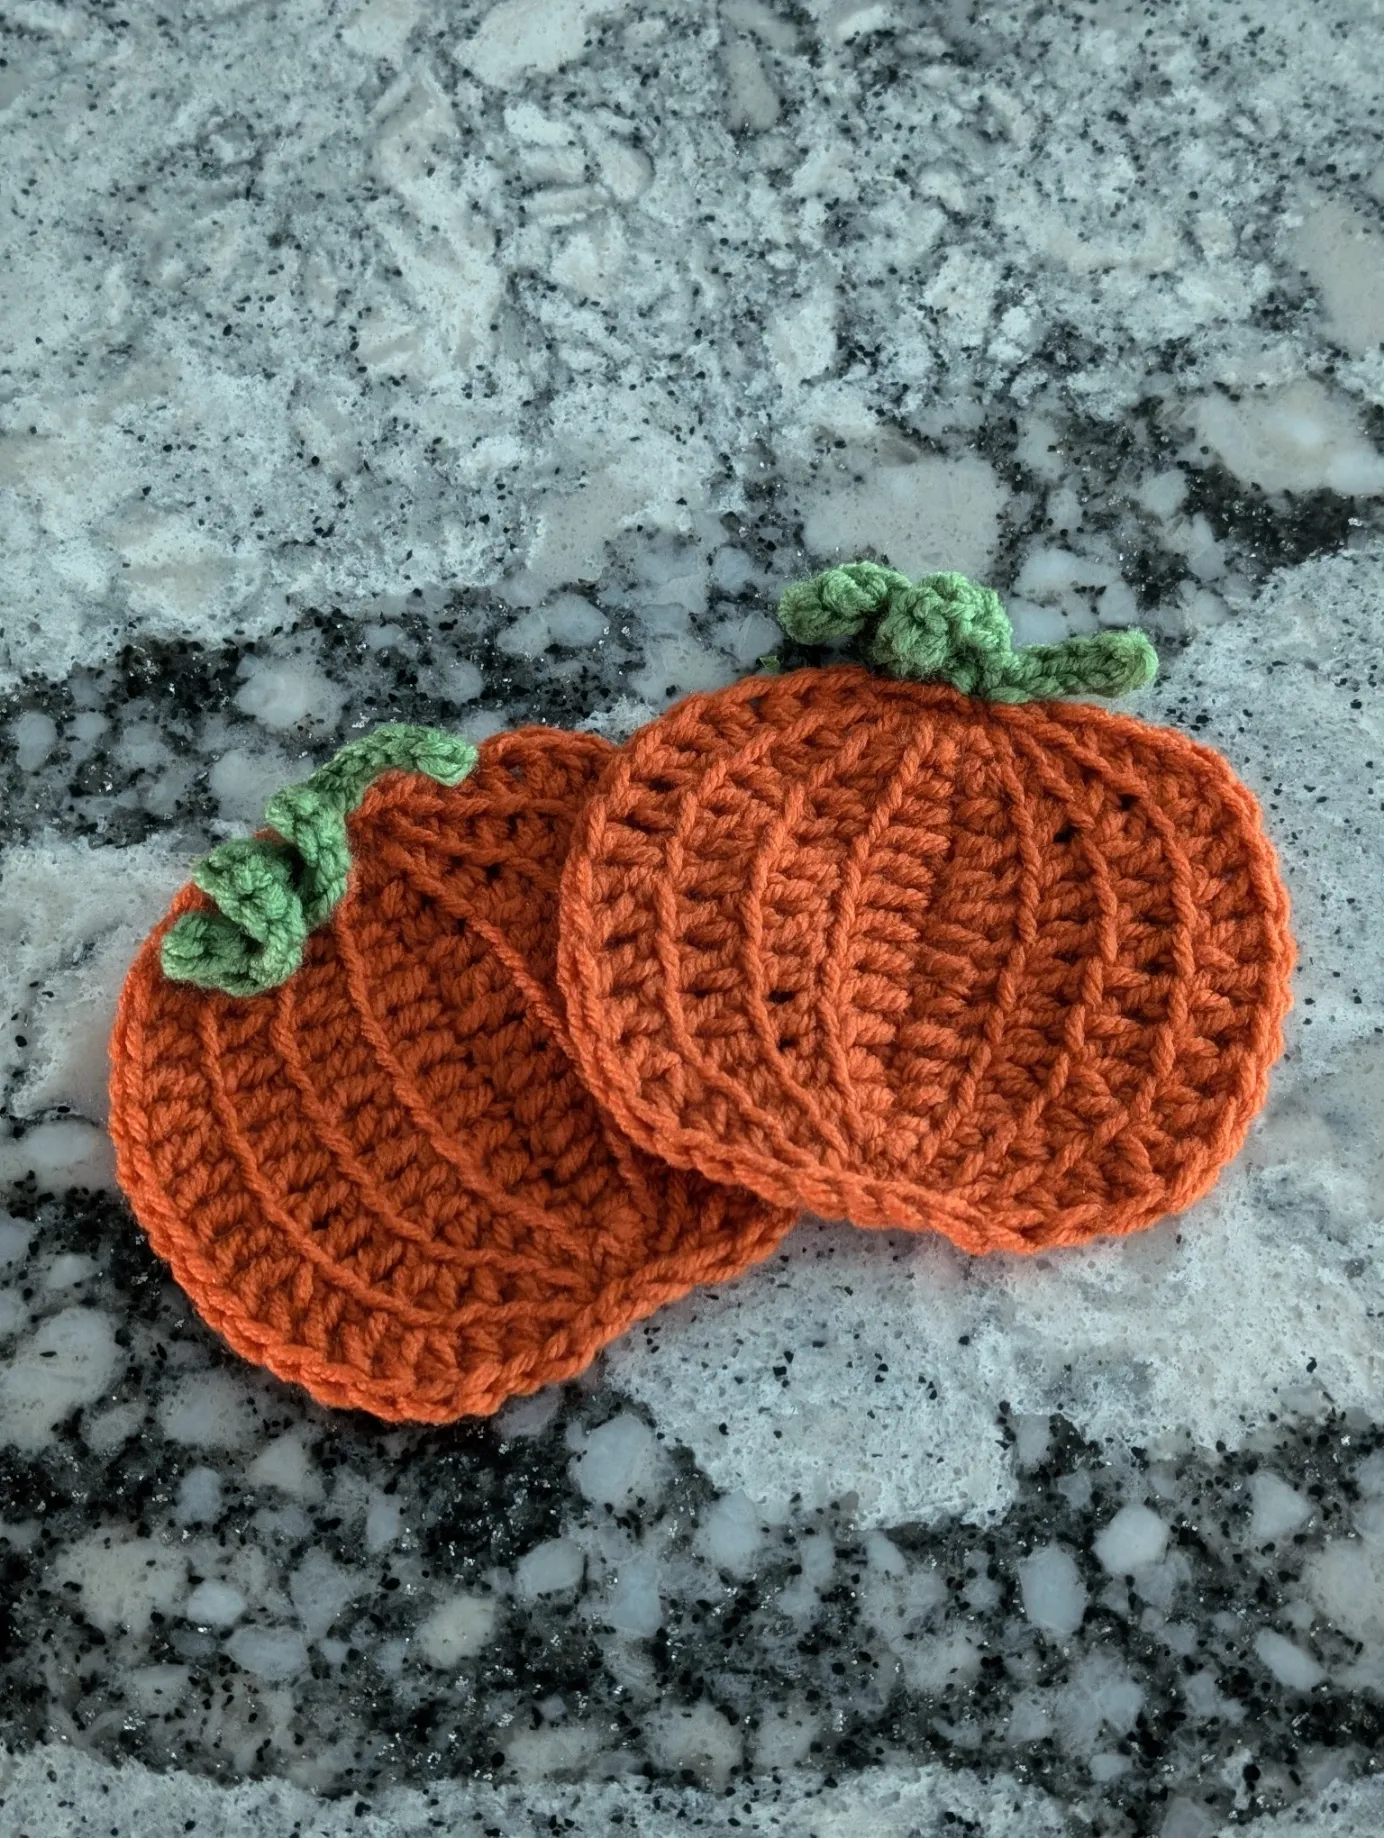
As the leaves start to turn and the air gets crisp, there’s nothing quite like settling in with a warm beverage. But why settle for ordinary coasters when you can add a touch of autumn charm to your coffee table? In this guide, we’ll walk you through the process of creating adorable crochet pumpkin coasters that are perfect for the fall season.

What You’ll Need
Before we start hooking, let’s gather our supplies. Here’s what you’ll need to create your own sunflower coasters:
- Worsted weight yarn in orange and green
- Size 3.5mm crochet hook
- Scissors
- Yarn needle for weaving in ends
Tip: Choose cotton yarn for your coasters. It’s absorbent and durable, perfect for protecting surfaces from cold drinks!
Basic Stitches You’ll Use
This is the foundation of most crochet projects. It’s a simple loop that you’ll build upon.
A basic stitch that creates a tight, sturdy fabric.
- Back Loop Only (BLO)
To create ridges and give your coaster that classic pumpkin look.
Gradually increasing the height of the row gives the pumpkin its shape.
A taller stitch that works up quickly and gives the pumpkin shape.
- Slip Stitch (sl st)
A stitch to join rounds or move from one part of the project to another without adding height.
Creating Your Pumpkin Coaster
Start with the orange yarn to create the pumpkin.
Ch 14.
Round 1:
- 1 sc in 2nd ch from hook, (1 hdc in next sc) 2 times, (1 dc in next sc) 7 times, (1 hdc in next sc) 2 times, 1 sc in next sc
- 3 sc in the top sc
- 1 sc in the top sc, (1 hdc in next sc) 2 times, (1 dc in next sc) 7 times, (1 hdc in next sc) 2 times, 1 sc in next sc
- sl st in the 3 sc

Round 2:
- All BLO.
1 sc in next sc, (1 hdc in next sc) 2 times, 2 dc in next sc, (1 dc in next sc) 5 times, 2 dc in next sc, (1 hdc in next sc) 2 times, 1 sc in next sc - sl st in the 3 sc
- All BLO.
1 sc in next sc, (1 hdc in next sc) 2 times, 2 dc in next sc, (1 dc in next sc) 5 times, 2 dc in next sc, (1 hdc in next sc) 2 times, 1 sc in next sc - sl st in the 3 sc

Round 3:
- All BLO.
1 sc in next sc, (1 hdc in next sc) 2 times, 2 dc in next sc, (1 dc in next sc) 7 times, 2 dc in next sc, (1 hdc in next sc) 2 times, 1 sc in next sc - sl st in the 3 sc
- All BLO.
1 sc in next sc, (1 hdc in next sc) 2 times, 2 dc in next sc, (1 dc in next sc) 7 times, 2 dc in next sc, (1 hdc in next sc) 2 times, 1 sc in next sc - sl st in the 3 sc

Round 4:
- All BLO.
1 sc in next sc, (1 hdc in next sc) 2 times, 2 dc in next sc, (1 dc in next sc) 2 times, 2 dc in next sc, (1 dc in next sc) 3 times, 2 dc in next sc, (1 dc in next sc) 2 times, 2 dc in next sc, (1 hdc in next sc) 2 times, 1 sc in next sc - sl st in the 3 sc
- All BLO.
1 sc in next sc, (1 hdc in next sc) 2 times, 2 dc in next sc, (1 dc in next sc) 2 times, 2 dc in next sc, (1 dc in next sc) 3 times, 2 dc in next sc, (1 dc in next sc) 2 times, 2 dc in next sc, (1 hdc in next sc) 2 times, 1 sc in next sc - sl st in the 3 sc

Join with a slip stitch and fasten off.

Adding the Finishing Touches
Switch to green yarn.
- Attach green yarn in the middle of 3 sl st
- ch 6
- sl st in each ch staring at 2nd ch from hook
- sl st in middle of 3 sl st
- ch 12
- 2 sc in each ch staring at 2nd ch from hook

End with a slip stitch in top of 1st sc. Fasten off.
Conclusion
Congratulations! You’ve just created a charming, seasonal addition to your home decor. These crochet pumpkin coasters are not only functional but also serve as delightful conversation starters. Why not make a set of four or six to really bring the autumn spirit to your living space?
Remember, crochet is as much about the journey as it is about the finished product. Don’t be discouraged if your first attempt isn’t perfect – each stitch is a step towards mastery. Enjoy your cozy fall beverages on your new pumpkin coasters!

Happy crocheting!
Need help reading crochet patterns
Visit:
Leave a Reply